Thursday, June 30, 2011

Menu Plan July 1- July 7

Let's celebrate our Independence! It's the 4th of July weekend...and I am thankful for our freedom. I am thankful for our country.

We are also celebrating my youngest son's birthday. We have a family tradition for birthdays...on your birthday, you tell Momma what you want to eat for breakfast, lunch, dinner, and even dessert.

We also sing Happy Birthday to you... 10 times throughout day. It's an all day celebration...For my babies, I want to make their BIRTH day extra special.

Breakfast:

Ham, Egg, and Cheese Cups and fruit

Scrambled eggs, bacon, waffles, and Orange Julia (my son's birthday breakfast)

"Cars 2" cereal, string cheese, and fruit

Strawberry Muffins, yogurt, and fruit

"Best Ever Pancakes" , bacon, and fruit

Breakfast ham, homemade biscuits and homemade strawberry jam (recipe to come)


Lunch:

Hot dogs, Seasoned Crispy Fries, and fruit

Nacho's- with ground beef and cheese and fixin's

Homemade Yummy Yeast Rolls- for ham and cheese sandwiches, chips, and fruit (my son's birthday lunch)

Out to eat with the kids

B-que meatloaf (from the freezer), Creamy Mac n Cheese and veggie

Peanut butter and jelly sandwiches (homemade strawberry jam), chips and V-8 Fusion

Dinner:
Grilled cheeseburger, 40 minute hamburger buns, baked beans, MiMi's slaw, ranch dip and chips

Chicken and Rice casserole with peas

Easy Black Bean and Chicken Nachos with homemade Restaurant Style Salsa and fixin's

MiMi's Casserole with broccoli (my son's birthday dinner)

Fish Fry- with friends at the lake!! (I don't know what I am bringing yet)

Spaghetti, French bread- bread machine (recipe to come) and salad


Snacks:

Goldfish and cheese

Cafeteria Peanut Butter Balls- one of my kid's favorite snack. They are healthy!!! (recipe to come) They are slap full of protein!!

Teddy Grahams and dried cranberries (mix)

Fruit: (choices)
Georgia peaches
nectarines
frozen blueberries
frozen grapes

Desserts:

Lemon Ice Box Pie (my son's birthday dessert)

Smores (of some sort) I think smores are one of my favorite desserts or treats.

Sugar cookies (from the freezer) Bake em..and make ice cream cookie sandwiches.

Strawberry Milkshakes

No-Bake Monkey Bars (new recipe)


Freedom rings...Kristi

Tuesday, June 28, 2011

Moist Mini Blueberry Muffins


If you like blueberries...this muffin recipe will be a treat for you. The muffins are very moist. They are not your traditional muffin... a secret ingredient...yogurt. How fun!!


I really like this recipe. It is different. It is easy and quick to whip together.

Moist Mini Blueberry Muffins

Start off by washing your blueberries. Set them aside.


Melt butter in a small dish. Set aside and let cool.


In a medium size bowl. Combine flour, sugar, and baking soda.


**Baking tip** ...it is crucial when baking, to make sure your ingredients are measured accurately. Flour should be leveled off. Any other dry ingredient should be leveled off too.


In a separate bowl, (I used a Pyrex glass measuring cup) add butter, yogurt, egg, and vanilla. Whisk well.


Add yogurt mixture (wet ingredients) to flour mixture and stir just until combined. Just until the dry ingredients are wet.


Gently fold in blueberries.


Grease (I use butter) mini muffin tins. Batter will be thick. Use a spoon to fill muffin tins. It will make 24 mini muffins.


Bake for approximately 11-13 minutes.


Blueberry, blueberry goodness...


Sprinkle the muffins with raw sugar when finished baking. The raw sugar will give it a little crunch and texture. Moist muffin + Raw sugar = palate pleasing combination.

Moist Mini Blueberry Muffins
Adapted from Taste of Home

1-3/4 cups all-purpose flour
3/4 cup sugar
1 teaspoon baking soda
2 eggs, lightly beaten
1 small container blueberry yogurt
1/4 cup butter, melted and cooled
1 teaspoon vanilla extract
8 ounces fresh blueberries -washed and drained


In a small bowl, combine the first four ingredients. In another bowl, whisk the eggs, yogurt, butter and vanilla. Stir into the dry ingredients just until moistened. Fold in blueberries. Fill mini muffin cups coated with cooking spray. (I use butter) Bake at 375° for 11-13 minutes or until a toothpick inserted near the center comes out clean. Cool for 5 minutes before removing from pan to a wire rack.

If you want to make regular size muffins, just adjust the baking time.

Berry good dishes.....Kristi

Monday, June 27, 2011

New Camera .. Cheesy Beef and Pasta Casserole


Do you like the title of my new recipe? Guess what? My husband bought me a new camera for my birthday. Oh my...I am so excited. I am so thankful and so pleased. God is so faithful. This camera captures detail and I am fired up. I almost want to recreate all of my old post with new pictures. I can't tell y'all how many recipes that I have not posted just because the photos were awful. It is difficult to photograph food. It is important to capture details. Texture is important.

Okay...I'll reel it back in...I decided to make something new tonight. It wasn't even on my menu plan for the week. I wanted to make a new casserole that would contain beef, pasta, veggies, and cheese. I wanted it to be a quick meal that would be satisfying and kid friendly.

Here is what I came up with...

Preheat oven to 350. Boil noodles according to package directions and set aside. In a skillet, brown meat and onion. Drain.


Grease 8 x 11 pan. Put ground beef and noodles in baking dish. (This is one cool photo, can you see the steam billowing out?)


Now, add corn, peas, and mushrooms to baking dish and stir together. **I didn't use the entire can of corn. We didn't use peas this time, but..I will the next. (use about 1/2 to 3/4 a can of each)


In a saucepan (I used the same saucepan that I boiled my noodles in...less dishes)
Add 1/2 of cheese, cream of chicken, Worcestershire, seasoning, and milk. This is a flexible step, if you want more cheese...you can add it. If you want a thinner sauce, you can add more milk.


Cook on medium-low and stir often until cheese is melted. Pour over the beef and noodle mixture. Stir.


Sprinkle the remaining cheese on top.


Bake at 350 for about 30 minutes. Make sure it is heated thoroughly. It will bubble up.


New Camera Cheesy Beef and Pasta Casserole
Recipe adapted from Taste of Home

1 pound ground beef
1/2 onion- diced / you can use 2 tablespoons minced onion or season with onion powder
8 ounces elbow macaroni ( prepare pasta according to package directions)
1 can corn/ drained (optional ingredient)
1 can peas/ drained (optional ingredient)
1 small can mushrooms/ drained (optional ingredient)
3 cups shredded cheddar cheese (we are cheesy folks) You can use less.
1 can cream of chicken soup
3/4 cup milk
1 tablespoon Worcestershire sauce
salt, pepper, and garlic powder to taste

Preheat oven to 350. In a skillet, brown meat and onion. Drain.
Grease 8 x 11 pan. Put ground beef, noodles, corn, peas, and mushrooms in baking dish and stir. **I didn't use the entire can of corn. We didn't use peas this time, but..I will the next. (use about 1/2 to 3/4 a can)
In a saucepan, (I used the same saucepan that I boiled my noodles in...less dishes)add 1/2 of cheese, cream of chicken ,Worcestershire, seasoning, and milk. This is a flexible step, if you want more cheese...you can add it. If you want a thinner sauce, you can add more milk. Cook on medium-low and stir often until cheese is melted. Pour over the beef and noodle mixture. Sprinkle the remaining cheese on top. Bake at 350 for about 30 minutes. Make sure it is heated thoroughly. It will bubble up.

**This is a very flexible recipe** You can omit the peas, or corn, or mushrooms, add more cheese if you please (smile), you can add more milk..to thin out the sauce.**


Capturing the beauty of the dishes....Kristi

Friday, June 24, 2011

Yummy Yeast Rolls- bread machine

Oh, how I love some kitchen gadgets and appliances. I bought a new bread machine last year and have been soooo pleased with it. I use my bread machine once a week.

If you have shied away from making yeast rolls because there is kneading involved, a bread machine is the ticket. In this particular recipe, the bread machine does the kneading for you.

The recipe for these Yummy Yeast Rolls came from Tasty Kitchen. Tasty Kitchen is a great source for "keeper" recipes.


Out of all the yeast roll recipes that we have tried, this is my husbands favorite...hands down.

If you are not familiar with a bread machine, before you start, you'll want to review the manual. The manufacturer will give you their recommendation regarding the order, in which, you should add the ingredients.

The majority of manufacturers will have you add all the liquids first and then add the dry ingredients. The last ingredient added should be yeast.

You can start by adding your melted butter (this time, I used room temperature)and water to your bread machine. Make sure your water is a little warmer than a baby's bath.


Measure your flour accurately and add it to the bread machine. Add salt, sugar, and finally the yeast. (Dig a little well in your flour with a spoon and put your yeast in the well.)


Put your bread machine on the dough cycle. Test the dough midway through the kneading cycle to make sure the consistency of your bread is correct. Pick the lid up on the bread machine and push your finger into the dough; the dough should feel like it’s going to stick to your finger as you pull it away, but doesn't. That’s how you know the consistency is just right. If it is too sticky, add a tablespoon of flour. If it is still too sticky, add another tablespoon of flour. The dough cycle should take approximately 1 hour and 30 minutes.

I took these picture to show y'all how much your bread will rise.


Isn't it purty?


Once the cycle is done, punch the dough down.


Take it out of the machine. On a floured surface or Silpat, divide dough into 12 same size pieces.


Shape into balls and put into a buttered 9 x 13 baking dish.


Put a piece of plastic wrap over them and let rise, in a warm place, for approximately 30-45 minutes.


They will double in size.


Preheat oven to 375 and bake approximately 25 minutes. Bake until golden brown. Brush butter over rolls.


Yummy Yeast Rolls
Recipe from Tasty Kitchen

1 1/2 cup warm water
1 tablespoon yeast
3 tablespoons sugar
2 teaspoons salt
4 tablespoons butter/ room temperature
4 cups Bread Flour- I sometimes use 1/2 All Purpose and 1/2 Bread Flour

Add ingredients to bread machine as directed by manufacturer. Use the Dough Cycle. When dough cycle is completed. Punch down dough. Remove dough from machine. On floured surface or Silpat, divide dough into 12 pieces. Form dough into balls and put them in a buttered 9 x 13 pan. Cover with clean dish towel or plastic wrap. Put in a warm place and let rise for approximately 30-45 minutes. (or until doubled in size) Bake uncovered for 20-25 minutes...they will brown beautifully. Brush with butter. Real butter. smile.


Yeast friendly dishes....Kristi

Thursday, June 23, 2011

Menu Plan June 24- June 30

Have y'all made your menu plan for the week? Keep an eye on your sale ad's. There are always great deals around the 4th of July. Watch for grillin' meats, barbeque sauce (actually every condiment), baked beans, Cokes, marshmallows, charcoal, paper plates, ect..

This is a good time to stock up, if you are needing these items.

What are y'all eating this week? I'd love to hear what's cooking.


Breakfast:

Blueberry Muffins (new recipe) string cheese and fruit
Scrambled Eggs, bacon and fruit
French Toast, bacon and fruit
Cereal and fruit
Chewy granola bars (new recipe), yogurt, and fruit
Yogurt and homemade granola

Lunch:

Peanut butter, honey, and banana sandwiches, chips and fruit
Mini Cheeseburgers and 40 minute hamburger buns and fruit
Homemade Lunchables, carrots and ranch dressing and fruit
Thin crust cheese pizza, salad, and fruit
Spag'o casserole, peas, and garlic bread
Chicken nuggets, mac n cheese and fruit
Out for lunch/ the kids and I go out to eat for lunch- once a week

Dinner:

Coney Island Hot Dogs (new recipe), fresh garden tomatoes, and baked beans
Burnett Roast and squash casserole
Oven fried chicken/ we might have mashed potatoes again/ corn
Homemade chicken fingers, mashed potatoes, and green beans
Breakfast for dinner/ biscuits and sausage gravy with eggs
Oven baked chicken Parmesan, creamy rice, and steamed broccoli
Mexican night/ Fiesta Dip, chips, and homemade salsa

We will probably be eating tomatoes every night. Our garden is coming on!!!

Snacks:

Cheerio bars
Yogurt and homemade granola,fruit
Cinnamon Raisin Bread (bread machine) **my kids love this bread**
Pretzels and string cheese
Strawberry milkshakes

Desserts:

Birthday cake
Ice cream cones
Chewy chocolate no-bake cookies (my kids are beggin' for them...I am going to make a double batch this time.)
Homemade Banana Pudding


Fruit choices for the week:

Grapes/ purple and green
Fresh Georgia peaches
Bananas
Blueberries
Where are all the cherries this summer? We love cherries!!

So thankful for all these dishes...Kristi

Homemade Taco Seasoning

I can't say enough about this Homemade Taco Seasoning.

The first time we tried it...we were hooked. It is just good!! It is not spicy, it is smooth and mild. The chili powder and cumin are not over-bearing.

It is easy to make and it is "homemade". I don't know about y'all but, I am just drawn to "homemade".

Homemade Taco Seasoning

This recipe calls for several different spices/ ingredients. (not pictured: sugar, salt, and cornstarch)


Gather all your ingredients and a couple of small (snack size) baggies.

My daughter is my helper for this particular recipe. She takes pride in helping Momma in the kitchen. She is precious!

She gets her step stool out and bellies up to the counter. She will hold the baggies for me while I add the seasoning.


We add chili powder to all the baggies, then we will add onion powder to all the baggies, then oregano to all the baggies...so on and so forth.

Y'all know, there is always a method to my madness. smile.

We usually make 4 or 5 baggies at a time. Each baggie is equivalent to 1 packet of taco seasoning.


Guess what we had for dinner last night?

Tacos! Tacos with pinto beans and Homemade Salsa.

My daughter was so proud... she helped make dinner for her Daddy.


Homemade Taco Seasoning
Recipe courtesy of For Such A Time As This

1 tablespoon of chili powder
2 teaspoons of onion powder
1 teaspoon of cumin
1 teaspoon of garlic powder
1 teaspoon of oregano
1 teaspoon of paprika
1 teaspoon of salt
1 teaspoon of sugar
1 teaspoon of cornstarch
3/4 cup water (Use this measurement as a guide. I would start out with 1/2 water at first, if it needs more, then add accordingly.)

**This recipe is equivalent to 1 package of store bought taco seasoning**

Mix all the dry ingredients together. Add to your taco meat. Add water and stir well. Simmer for several minutes.


Try to get the kids in the kitchen. It makes such precious memories.....Kristi

Tuesday, June 21, 2011

Challenges in the Kitchen

As I sat down at my computer tonight, I had a chance to reflect upon our day.

We cried as a family today. We experienced an event in our lives that will forever change us. Life brings many challenges. God never told us that things would be easy but He did say that He would never leave us or forsake us.

We don't understand why things happen the way they do... We don't understand why people have to hurt and suffer emotionally and physically. The Lord has a purpose for our lives. Despite the challenges and hurt we experience, we need to press forward, believing in Him. Not to give up, keeping our eyes on Him.

Romans 8:18 Just as Paul says, "For I consider that the sufferings of this present time are not worthy to be compared with the glory that is to be revealed to us.

If we have Jesus, we have hope. He knows our struggles and the mountains we face.

Everyday challenges...

How about our busy schedules? How can I accomplish all of this in 24 hours?

(baseball practice, soccer practice, dance recital, doctor visits, running errands, birthday parties on the same day at the same time, getting the kids enrolled for school, getting senior pictures made, band practice, ect...)

What about getting a flat tire on your way to work? (and your already running late)

Getting a summer cold, swimmers ear, or a sinus infection?

HE cares about all your challenges. Nothing is too big or small for HIM.

Get this...

I told my husband dinner would be ready at 5:30 p.m. and dinner wasn't on the table until 7. (he gets real grouchy when he is hungry)

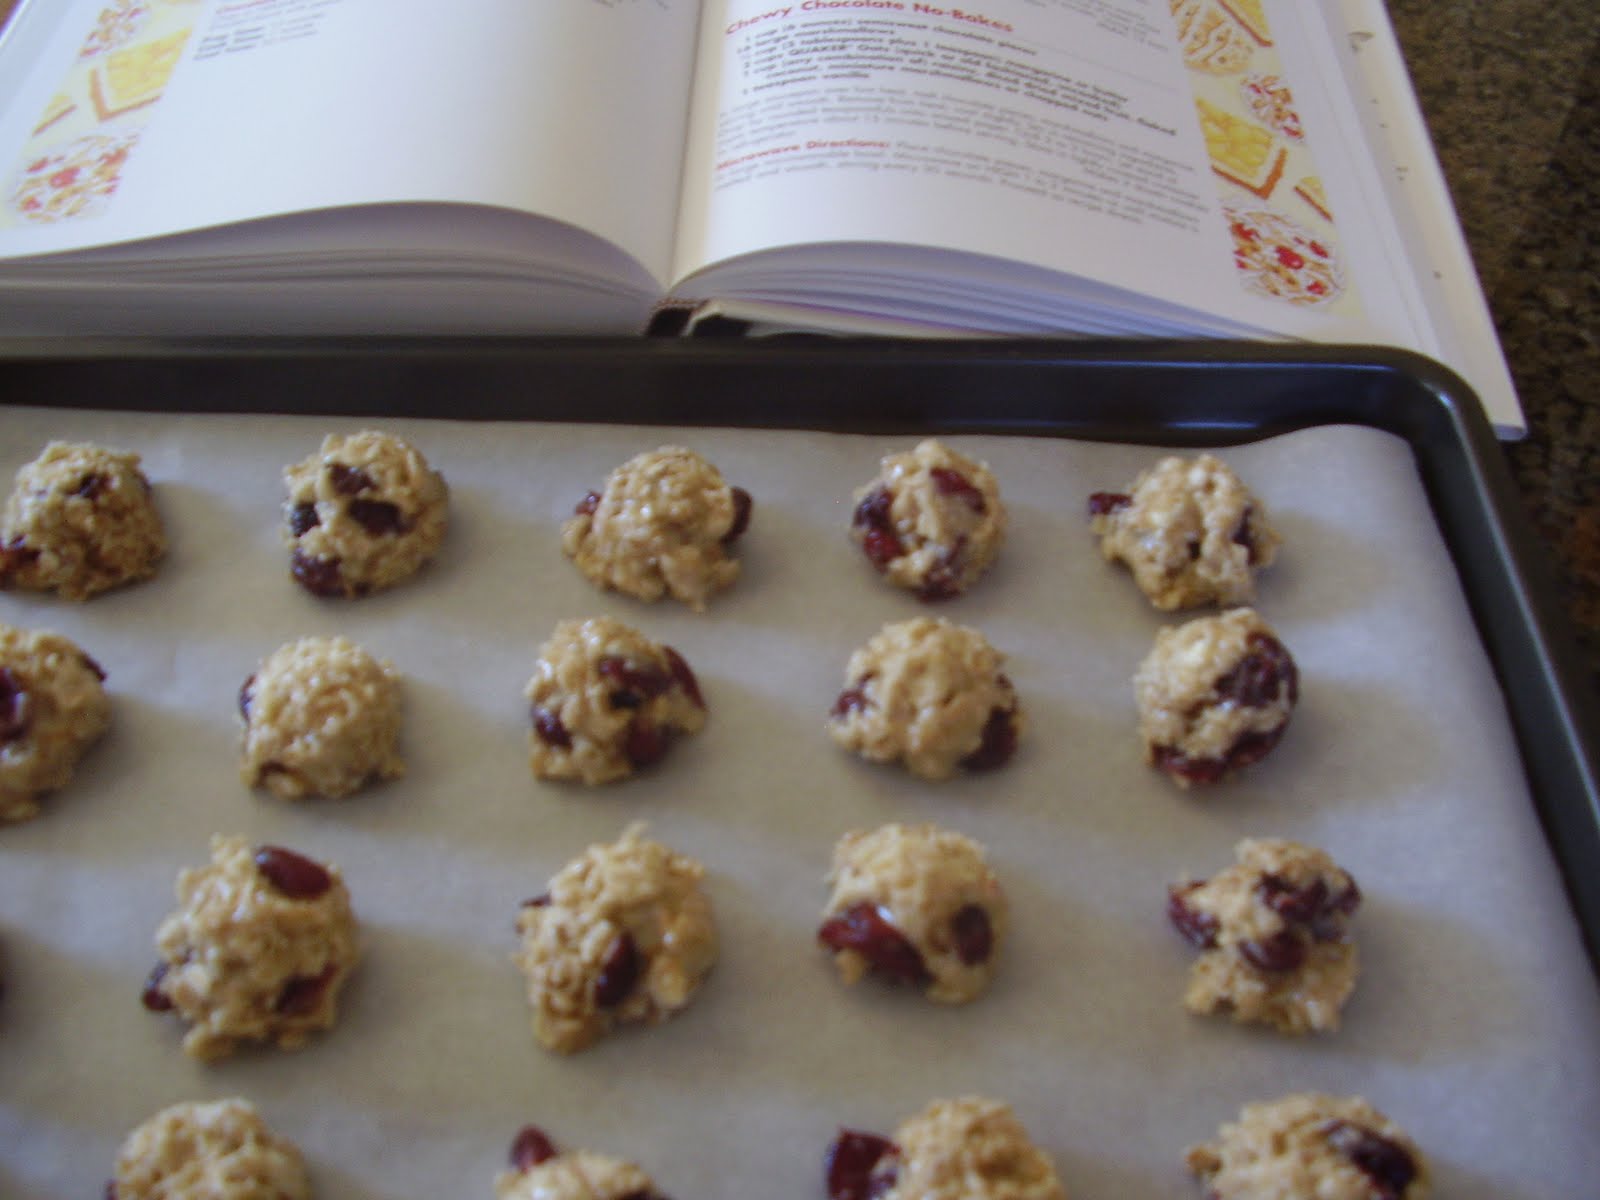
I went to take a batch of cookies out of the oven and they ended up on the floor.

I forgot to grease a baking dish... and spent 30 minutes chiseling baked-on barbecue sauce.

I have been trying for 15 years to make Grandma Betty's Apple Pie. After all these years, it still doesn't taste like Grandma's. (will it ever?) smile.

It gets frustrating. You give it all you got..and it doesn't work out. What's next? Don't give up. Stay in it!!! Stay encouraged!!! We have to be diligent in our efforts! I am thankful that I didn't give up in the kitchen. I am thankful that the Lord is faithful and he will see my family through our trials big or small.

I thought I would share some more "mountains" in the Burnett kitchen...y'all ready?

I have tried 100's of recipes for Ranch Dressing and still haven't found a winner.

I have tried numerous recipes for the best Red Velvet Cake...still searching. Red Velvet cake is my husband's favorite cake and he is very picky about his frosting. I have come close but he hasn't given me the thumbs up yet. Still trying.

I have tried sooooo many recipes for the perfect Soft Sugar Cookie. I want to replicate the soft sugar cookies from the Publix bakery. No keepers yet. I am not a fan of cream of tartar and alot of sugar cookie recipes call for it. Still searching.

I want to replicate the Angel Food Cake/ Pound Cake that Aldi sold during the spring/ summer months. Apparently they have done away with it. My children and I are crushed. We look forward to it every year. sad face.

Homemade Spaghetti Sauce..whew..just thinking about it...will wear me out. I have taken a break from trying to make a spaghetti sauce. I am taking a break but not giving up.

Chewy Granola bars...all I can say is "the search continues."

Stay encouraged...there is hope...listen to this...

I am happy to report that I have finally found THE ultimate Chocolate Chip Cookie recipe. It has taken me 10 years to accomplish this goal. My husband is grateful. smile.

Just yesterday, I conquered our Homemade Salsa. Thank you Lord. It has been a long journey.

Last week....I scored it big with my kids. I made some Strawberry Muffins. My oldest son said "Momma, you finally did it." "Your muffins taste like those baby muffins you can buy at the store, ya know the ones that come in a box and inside the box are those individual size packages of muffins...I knew exactly what he was describing. I wanted to pump my fist in the air and give a big "OH YEAH!"

I believe everything has a life lesson. There is no such thing as a coincidence. God is in control. He knew that today was going to be a difficult day for my family. He knows our hearts are heavy and burdened. He knew that my all my "kitchen challenges" would be used to teach me something. To teach me more about Him and his unfailing love.

He cares for you. He loves you. He cares about your heartache, your happiness, your daily struggles, and your kitchen challenges too.

Challenging dishes....Kristi

Monday, June 20, 2011

Easy Restaurant Style Salsa


I've been huntin' for a perfect restaurant style salsa for years. I cannot begin to tell y'all how many different recipes I have tried. They were good but not perfect.

My husband loves a good salsa. Let's just put it this way, when we eat at the Mexican restaurant, he gets his salsa bowl refilled about 5 times. (no exaggeration)

If an authentic tasting salsa is important to my husband, it is important to me. smile.

I recently found a recipe for Simplified Salsa at Good Cheap Eats. I was drawn to her method of incorporating all the ingredients.


Easy Restaurant Style Salsa

1. Cut your onion in half. (We are only going to use 1/2 of an onion.) Cut 1/2 onion into 1/4's. (just chunk it up)

2. Put it into your food processor and pulse 5 times.

3. Clean your cilantro really well. We are only going to use 1/2 bunch of cilantro. Cut off the stems.

4. Put the leafy part of your cilantro into the food processor.

5. Pulse 5 times.


6. Add 6-8 pickled jalapeno pieces. (comes in a jar) **you can use the real deal..just make sure you wear gloves when handling)


7. Pulse 5 times.

8. Add 28 oz. tomatoes and its juice, the juice of 1/2 lime, and salt.

9. Pulse about 5 times. You can pulse as much as you want. If you like your salsa thin, pulse more.

10. Taste it.

11. Taste it.

12. Taste it. If you want more heat, add a couple more jalapeno slices. Pulse.

13. Taste it. If it needs more salt, add it. Pulse.

14. Taste it. Taste it until it is perfect for you and your family.

15. Refrigerate for 2-3 hours. If you can wait long enough..refrigerate over night. The longer it sits, the more the flavors will blend together.

16. ENJOY!!!

Easy Restaurant Style Salsa
Adapted from Good Cheap Eats

28 oz. of diced tomatoes (not drained)
1/2 Vidalia onion
1/2 bunch cilantro (no stems)
6-8 pickled jalapeno pepper pieces- in a jar (if you like it hot..add more)
Juice of 1/2 lime
Coarse salt (salt to taste)

Cut 1/2 onion into 4ths. Put into food processor. Pulse 5 times. Add cilantro. Pulse 5 times. Add jalapeno. Pulse 5 times. Add tomatoes, lime juice, and salt. Pulse 5 times. You can pulse more or less if needed. Just pulse based on the consistency you prefer. Taste it..you may need to add more salt. **Put salsa in the frig for a couple of hours before serving. If you can wait, leave your salsa in the refrigerator overnight.**

Verdict: My husband told me that I finally had gotten it right. He said "Babe, this salsa is so good, I could drink it."

I did it! I finally did it! I finally HIT the JACKPOT!! (and I don't gamble) smile

Guess what were having for dinner? Tacos, pinto beans, Mexican rice, and salsa? Yes ma'am.

**sorry there is not more pictures but, they just didn't turn out**

Accomplished dishes...Kristi

Sunday, June 19, 2011

Chewy Chocolate No-Bake Cookies


I couldn't stand it...I just had to make some cookies. New cookies.

I have been laid up in the bed for 2 days now. I hurt my back and can barely walk or stand. My kids told me that I am getting old. Okay, I know I am getting old but you know it's bad when your kids tell you that your getting old.

After church today, one of my sweet friends came to check on me. She brought me some Biofreeze for my back. Thank you! Guess what? She also brought me a new cookbook. Thank you! Thank you! I am blessed to have such sweet friends!!

So, for most of the day, I've been laying in the bed and just brewin' over my new book. Sooooo many recipes that are calling my name. yipppeee!

I had to make some cookies!!!

This recipe comes from "The Cookie Bible." It is 310 pages of cookies. Me eat more cookies!

There is one section specifically devoted to "No Bake Delights." This is perfect! What a great summer dessert! This particular recipe calls for the cookies to be kept in the frig. COLD cookies on a HOT day!

Chewy Chocolate No-Bakes
Recipe from The Cookie Bible

In a medium size microwave safe dish, start melting butter, marshmallows, and chips. I used white chocolate chips. If you're an avid chocolate fan, use semi-sweet. How about peanut butter chips? YUM!


Start with 45 seconds and stir. At first, it will look like a gooey mess. It's okay.


Microwave another 45 seconds and stir. Repeat until mixture is smooth.

Cool slightly.

Stir in remaining ingredients. I used dried cranberries. You can use chopped nuts, diced dried fruit, coconut, miniature marshmallows. **Your options are endless**


Drop by small scoopies onto parchment paper. (you can use waxed paper)


Chill 2 to 3 hours. Keep in tightly covered container in the refrigerator.


Chewy Chocolate No-Bake Cookies
Recipe courtesy of The Cookie Bible

1 c white chocolate chips (you can use semi-sweet)
16 large marshmallows
5 tablespoons margarine or butter
2 cups quick oats or old fashioned oats (I used quick)
1 cup dried cranberries (You can use raisins, any diced mixed fruit, flaked coconut, miniature marshmallows or chopped nuts.)
1 teaspoon vanilla

In a large saucepan over low heat, melt chocolate pieces, marshmallows, and margarine, stirring until smooth. Remove from heat, cool slightly. Stir in remaining ingredients. Drop by rounded teaspoonfuls (I use my small scoopy) on parchment paper or waxed paper. Chill 2 to 3 hours. Store in tightly covered container in refrigerator.

Combination ideas/ suggestions:

white chocolate chips and dried cranberries
semi-sweet chocolate chips and marshmallows = smores
peanut butter chips and chopped nuts

They are easy to make! They are sweet and chewy!
Next time, I think I'll double the batch..yummo!

This is a great summer cookie. Your kids will be jumping up and down chanting..MORE, MORE, MORE!!

Summer dishes....Kristi


Friday, June 17, 2011

Seasoned Crispy Fries


Seasoned Crispy Fries and an Unseasoned Blogger....

I am the Unseasoned Blogger. This morning I had a close friend come to the house. She helped me jazz up my blog. It needed a lift. She is a Business teacher at one of the local high schools. She is an excellent teacher!! She is resourceful, knowledgable, and a dependable friend.

Guess what? She gave me a new cookbook for my birthday...ALL chocolate desserts. Thank you ma'am!!

When my husband came home from work..he saw my new cookbook sitting on the countertop. He had a fit! He asked me "What's for dessert tonight?"

My kids were so patient and tolerant of me being on the computer all day. They never complained or fussed about it, my kids are so good to their Momma.

I made them something special for lunch today.. homemade french fries...Seasoned Crispy Fries.

WoW..we appreciate a good french fry around here. My oldest son would eat french fries for breakfast if I let him. French fries are his favorite food with a close second being.. "Extreme Dill Pickle Potato Chips."

I found this recipe at Lynn's Kitchen. Lynn is one of my favorite food bloggers. It seems like everything she posts...I want to try! Thank you! Keep em' coming Lynn.


Seasoned Crispy Fries/ French Fries

Preheat oven to 450. Peel taters.


Cut them into sticks...french fry sticks.


Put vegtable oil and seasoning in mixing bowl and add potatoes. Mix well. You want all the potatoes to be covered.

Dump potatoes on baking sheet and bake 15 minutes. Stir potatoes to loosen, and bake about 10 minutes more. You want the edges crisp.


Seasoned Crispy Fries
Recipe courtesy of Lynn's Kitchen Adventure

2-3 lbs. of russet/ baking potatoes
1/4 cup vegtable oil
2 teaspoons Emeril's Seasoing. (I used Jane's Krazy Mixed-up Salt/ Original) My all time favorite!!! Jane's Krazy Mixed-up Salt/ original is good on anything: potatoes, fish, pasta, chicken, ect. Look for it at your local grocery store.

Heat oven to 450 degrees. Peel poatoes and cut into french fry size. Slice them and then cut slices into sticks about 1/4-1/3 inches thick. Toss potatoes in oil and seasoning. Bake for 15 minutes, stir potatoes to loosen, and bake 10 more minutes or until edges are crisp.

The verdict... watch out McDonalds!


Seasoned dishes...Kristi